Homemade Reese’s Cups
Highlighted under: Sugar & Whisk
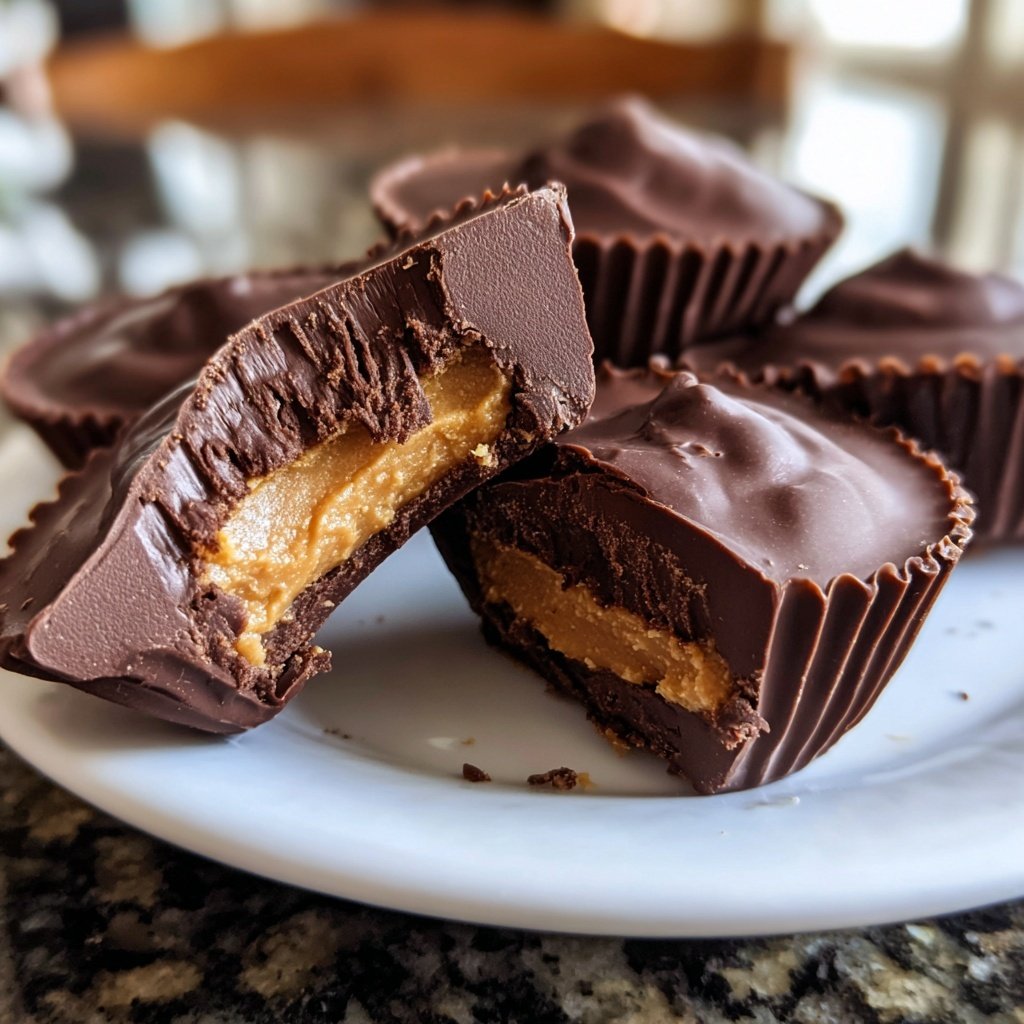
Indulge in the rich and creamy goodness of homemade Reese’s Cups, a delightful treat that combines chocolate and peanut butter in a perfect harmony.
There's nothing quite like the taste of a classic Reese’s Cup, and making them at home allows you to enjoy them fresh and customize the flavors to your liking. This recipe brings together simple ingredients to create a delicious treat that’s perfect for sharing or enjoying all to yourself!
Why You'll Love This Recipe
- Rich chocolate flavor paired with creamy peanut butter
- Customizable sweetness to suit your taste
- Perfect for parties, gifts, or a sweet snack
The Perfect Treat for Any Occasion
Homemade Reese’s Cups are not just a delightful dessert; they are a versatile treat that fits perfectly into any occasion. Whether you’re hosting a birthday party, a holiday gathering, or just want to indulge in a sweet snack, these cups are sure to please. Their rich chocolate exterior coupled with creamy peanut butter filling creates a flavor combination that everyone loves. You can even customize the toppings or fillings to suit different tastes, making them a hit for both kids and adults alike.
These homemade treats are also great for gifting. Imagine presenting a beautifully packaged box of homemade Reese’s Cups to friends or family. Not only do they taste incredible, but they also show that you’ve put in the time and effort to create something special. You can personalize the recipe by using dark chocolate or adding a sprinkle of sea salt on top for an extra gourmet touch.
Tips for Perfect Homemade Reese’s Cups
To ensure your homemade Reese’s Cups turn out perfectly every time, it’s important to work with high-quality ingredients. Opt for good-quality milk chocolate chips and creamy peanut butter to achieve the best flavor and texture. Avoid using natural peanut butter that separates, as it may not hold its shape well in the cups. Additionally, you can experiment with different types of chocolate—dark chocolate and even white chocolate can create exciting variations on this classic treat.
When melting the chocolate, be patient and melt it in small intervals to avoid burning. Stir frequently and ensure that the bowl you’re using is completely dry, as any moisture can cause the chocolate to seize. If you find that your chocolate is too thick, you can add a teaspoon of coconut oil or vegetable oil to thin it out, making it easier to work with.
Storage and Shelf Life
Once you’ve made your delicious homemade Reese’s Cups, you’ll want to know how to store them properly to maintain their freshness. Store the cups in an airtight container at room temperature for up to a week. If you live in a particularly warm climate, consider refrigerating them to prevent the chocolate from melting. However, be sure to let them come to room temperature before enjoying, as this will enhance the flavor and texture.
If you want to keep your Reese’s Cups for longer, you can freeze them. Simply place the cups in a single layer on a baking sheet and freeze until solid. After that, transfer them to an airtight container or freezer bag. They can be kept in the freezer for up to three months. When you’re ready to enjoy, allow them to thaw in the refrigerator or at room temperature.
Ingredients
For the Cups
- 1 cup milk chocolate chips
- 1/2 cup creamy peanut butter
- 1/4 cup powdered sugar
- 1/2 teaspoon vanilla extract
- 1/4 cup mini chocolate chips (optional for topping)
Make sure to have all ingredients measured and ready before you start for a smooth preparation.
Instructions
Melt the Chocolate
In a microwave-safe bowl, melt the milk chocolate chips in 30-second intervals, stirring in between until smooth.
Prepare the Muffin Tin
Line a muffin tin with cupcake liners. Use a spoon to add a layer of melted chocolate to the bottom of each liner, about 1 tablespoon.
Make the Peanut Butter Filling
In another bowl, combine the creamy peanut butter, powdered sugar, and vanilla extract. Mix until well combined and smooth.
Add Peanut Butter Filling
Spoon about 1 tablespoon of the peanut butter mixture over the chocolate layer in each liner, spreading it evenly.
Top with Chocolate
Pour another layer of melted chocolate on top of the peanut butter filling, ensuring it's fully covered.
Chill and Set
Place the muffin tin in the refrigerator for at least 1 hour to allow the cups to set completely.
Enjoy!
Once set, remove the Reese’s Cups from the liners and enjoy your homemade treat!
Store any leftovers in an airtight container in the refrigerator for up to a week.

Pro Tips
For a twist, try using dark chocolate or adding a sprinkle of sea salt on top before chilling.
Variations to Try
One of the great things about homemade Reese’s Cups is their versatility. You can easily switch up the traditional peanut butter filling by using almond butter or cashew butter for a unique flavor twist. Additionally, incorporating ingredients like crushed pretzels, rice krispies, or even shredded coconut into the filling can add texture and surprise to each bite. Experimenting with flavors can lead to delightful new creations that you and your loved ones will enjoy.
For a healthier version, consider using dark chocolate and natural nut butters with minimal added sugars. You can also adjust the amount of powdered sugar in the filling to suit your taste, making it less sweet if desired. These variations not only cater to different dietary preferences but also make the treat suitable for various occasions.
Serving Suggestions
Homemade Reese’s Cups are delicious on their own, but you can elevate the experience by serving them with a scoop of vanilla ice cream or a dollop of whipped cream. Drizzling some melted chocolate or caramel sauce on top before serving adds an extra touch of indulgence. For a fun party idea, create a candy bar with various toppings and allow guests to customize their own Reese’s Cups.
Pairing these treats with a hot beverage like coffee, hot chocolate, or even a rich stout beer can also enhance the flavors and create a delightful dessert experience. Consider making a dessert platter that includes other homemade sweets alongside your Reese’s Cups for a complete treat that will impress your guests.
Questions About Recipes
→ Can I use natural peanut butter?
Yes, but it may alter the texture slightly due to the oil separation.
→ How do I store the Reese’s Cups?
Keep them in an airtight container in the refrigerator for up to a week.
→ Can I make these vegan?
Yes, use dairy-free chocolate and a vegan peanut butter alternative.
→ What can I use instead of cupcake liners?
You can use silicone molds or simply grease the muffin tin well.
Homemade Reese’s Cups
Created by: Natalie Briggs
Recipe Type: Sugar & Whisk
Skill Level: Intermediate
Final Quantity: 12 cups
What You'll Need
For the Cups
- 1 cup milk chocolate chips
- 1/2 cup creamy peanut butter
- 1/4 cup powdered sugar
- 1/2 teaspoon vanilla extract
- 1/4 cup mini chocolate chips (optional for topping)
How-To Steps
In a microwave-safe bowl, melt the milk chocolate chips in 30-second intervals, stirring in between until smooth.
Line a muffin tin with cupcake liners. Use a spoon to add a layer of melted chocolate to the bottom of each liner, about 1 tablespoon.
In another bowl, combine the creamy peanut butter, powdered sugar, and vanilla extract. Mix until well combined and smooth.
Spoon about 1 tablespoon of the peanut butter mixture over the chocolate layer in each liner, spreading it evenly.
Pour another layer of melted chocolate on top of the peanut butter filling, ensuring it's fully covered.
Place the muffin tin in the refrigerator for at least 1 hour to allow the cups to set completely.
Once set, remove the Reese’s Cups from the liners and enjoy your homemade treat!
Extra Tips
For a twist, try using dark chocolate or adding a sprinkle of sea salt on top before chilling.
Nutritional Breakdown (Per Serving)
- Calories: 380 kcal
- Total Fat: 26g
- Saturated Fat: 15g
- Cholesterol: 195mg
- Sodium: 85mg
- Total Carbohydrates: 32g
- Dietary Fiber: 3g
- Sugars: 24g
- Protein: 6g